Followers

Monday, October 7, 2019

bunting ( Tourism Malaysia)


Hello and assalamualaikum everyone , so this is group bunting about Tourism Malaysia. 


Tuesday, October 1, 2019

Designing Bunting


BlowBrush Font Generator Preview 


Hello and Assalamualaikum. So now i would like to tell you about bunting. It is a long strip of cloth with a slogan or design to be hung in a public places like in a lobby or by the side of road streets.


a) Interpretation media, bunting is under Printed and Graphic Interpretation Media because it is for outdoor use. Furthermore, it communicates using graphic elements and important tool that enhances how a person communicate with others.


b) Our bunting objectives are to attract students to learn more about tourism Malaysia and help to develop tourism sector and promote new investments in the country as well as provide increased employment opportunities in the future. As this subject will teach students to understand better about culture, attractions, traditional food, clothing and games in Malaysia.


c) Elements in designing the bunting include putting pictures related to Tourism Malaysia subject like any attractions or landcape like the infamous Kuala Lumpur. Culture about races in Malaysia including indigenous people like Kadazan, Iban, Murut. Food that represents Malaysia like Malaysian's favorite dishes which is Nasi Lemak. Then rendang, nasi kerabu and nasi dagang . Next there's also traditional games like wau, five stones (batu seremban), ketingting that is often played by girls because there is not fixed rule for the number of people to play it. Also congkak or mancala game which has simple rules that allow the boards to have different number of holes.


d) Bunting tools that we used is Microsoft Publisher which is a desktop publishing application from Microsoft, difference from Microsoft Word in that the emphasis is placed on page layout and design rather than text composition and proofing. Other than that, we need tools like tripod foot, double hanger and clip stopper.


e) The  printing cost. Usually it costs above RM30+ or sometimes based on the pritning shops you went to. Meanwhile, the tripod PMKu rent it to us but if you want to buy, it usually costs around RM25+.

So this is the simple video on how to design a bunting using Microsoft Publisher.


Friday, September 20, 2019

MERDEKA VIDEO

Hai, this is video about Pentasrama 3.O Politeknik Metro Kuantan .


MERDEKA GROUP SHOW

Hai , this is my video  at Pentasrama 2.O Politeknik Metro Kuantan. This is our show so watch and enjoy it.


Wednesday, September 18, 2019

RAYA KORBAN VIDEO

Hai , here it is video about hari raya korban . This is my group video . Enjoy it .


Monday, September 16, 2019

INTERPRETIVE TALK AND PRESENTATION TECHNIQUES VIDEO


INTERPRETIVE TALK AND PRESENTATION TECHNIQUE

Hai, my name is Arni Basirah Binti Arbain, today i would like to talk about intrepertive talk and presentation technique.

1.Describe what is intrepertive talk.

An interpretive talk is a planned presentation to an audience that provides opportunities for visitors to become aware of natural and/or cultural resources and the values of meanings they represent.

2. Example of intrepertive talk and presentation.

When they talk it will present the purpose of a place, as well as human relationships to and relationship among the natural, cultural and/or historical environments.


The talk must relate to and build on visitors' past experience and previous knowledge.

3.Example of interpretive presentation tools. 

  • Genial.ly
  • PowerPoint online
  • Google slides
  • Pitch deck
  • Canva 

4.How to apply interpretive presentation tools for different audience and resources

- Genial.ly : 

A single platform for all kinds of interactive content. Show off your ideas and turn them into unforgettable stories. Put interactive effects and animations in your presentations. Surprisingly, you can include content from a number of external services in your presentations, such as Spotify, YouTube, Google Maps, Amazon, etc. Another interesting thing is, you get access to various premium templates, using which you can create unlimited presentations.

- PowerPoint online :

PRLrovides you all the basic features like images, transitions, animations, etc. and various templates to create a presentation. You can download the presentation as a PDF file for offline viewing, and also share with people or embed in your blog or website.

- Google slides :

You can  create, edit, and collaborate on amazing presentations. You’ll find a variety of templates, fonts, embedded videos, animations, and lots more in this free app. You can edit and save presentations directly in the cloud like above apps. So it will give more attractive to the audiance. 

- Pitch deck : 

Pitch Deck offers pre-built, drag-and-drop templates to create compelling presentations. You can add graphs, images, videos, and polls in your projects, and after it’s done, you can share your projects with others. Moreover, you can view your presentations from anywhere, any device.
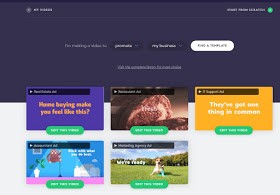
- Canva :

Canva is a drag-and-drop presentation tool where you get hundreds of amazing layouts to create presentations on any subject. In canva you can choose the suitable images, fonts, colours, themes and lot more to suit your brand requirements. You also get access to over a million of quality, stock photos, and can also upload custom images


Thursday, September 12, 2019

Masjid Kapitan Keling

Hai, my name is Arni Basirah Binti Arbain. So today i would like to share about interpretation media at Kapitan Keling Mosque , Penang .


Thursday, August 22, 2019

Myself

TOTURIAL VIDEO

Hi assalamualaikum. Hari ni saya nak ajar korang semua macam mana nak buat video mengunakan ‘BITEABLE”. Video ni korang boleh guna juga masa nak buat resume untuk menampak kan video tu menarik. Kalau tak nak buat resume korang boleh buat video travel.

cara ini diajar oleh pensyarah saya, Miss Akasyah.


Okay first sekali korang tekan link ni https://app.biteable.com/videos


Log in mengunakan Google Account lebih senang. Korang dah boleh buat video korang. Tekan CREATE A NEW VIDEO.


Okay next, dia akan keluar macam ni. Korang boleh pilih dekat promote tu nak buat apa. Dekat situ ada banyak. Kemudian dah siap pilih korang tekan FIND A TEMPLATE. Lepas tu dia akan keluar banyak jenis template macam dekat bawah tu. Kemudian tekan EDIT THIS VIDEO.


Dekat sini korang semua boleh pilih template apa yang korang nak. Boleh adjust berapa lama video korang nak buat. Lepas dah settle semua ni. Korang tekan PREVIEW.


Next, korang tekan je BUILD MY PREVIEW


Lepas dah tekan tu dia akan prosess video korang dalam beberapa minit. Semakin banyak scene makin lama la video. Insyaallah tak sampai setengah jam.


Lepas dah siap video korang diprosess.Korang tekan PUBLISH THIS VIDEO.


Bila dah publish tu, video korang pun dah siap tapi belum save lagitau.  kalau korang macam nak save video ni. Korang tekan sahaja dekat yang ada gambar YOUTUBE.Masukkan account gmail. Then dia akan terus connect kan dekat youtube. Lepas tu buka youtube, Tekan dekat YOUR CHANNEL.


Lepas dah siap tekan your channel, dia akan keluar video korang yang dah diupload tadi.Contoh macam saya punya ni.

Korang click video yang korang dah upload tadi.


Lepas tu dia akan keluar video korang tu. Korang gantikan WWW. tu dengan SS
Make sure sekali dengan titik www tu okay! (jangan lupa)

Nanti dia akan keluar macam ni. Tengok tu, ss ok.


Ok lepas dah gantikan www. tu dengan ss . Dia akan keluar macam ni pula. Korang tekan je DOWNLOAD. Kemudian dia akan automatik download video korang tu.


Semoga membantu serba sedikit. Sambil-sambil tu boleh lah tengok video saya dekat youtube ( https://www.youtube.com/watch?v=-WK1tH3ty68&t=2s )

How to use Picmonkey

How to use Pickmonkey (graphic design)


Step :

1. Tap the blue + sign on the app’s home screen. Then tap 'Design'

2. You can also choose your own canvas size and select from dozens of beautiful patterns or solid colors. Pick the color that you want your canvas to be.

3. You can also add your own color by swiping a color wheel, adding a hex code, or selecting an RGB value.

 4. Tap 'Next' in the top right corner.

 5. Start adding some elements like text and stickers.

 6. You can further customize your stickers by tapping the 'Erase' button and erasing them and you'll done after it. 


This is the simple video :


How to make a simple poster using Picsart

How to make a simple poster using Picsart ?


STEP :

1) First, fill the background colour.

2) Second, click tools and select crop.

3) Choose the potrait size.

4) Click draw to upload your picture.

5) Next, click empty layer and draw outside the subject picture.

6) Add text using suitable font 

7) Click blend to make sure the text blend with background colour

8) Edit the picture.


This is the simple video of step using picsart :


Posting using ILLUSTRATOR

Posting using ILLUSTRATOR


How to use illustrator ?

 Step :

 1) Upload your photo

2) make sure it is a high quality picture

3) Click more setting to options to preset for size

4) For the tutorial choose the A3 size of paper

5) Add 3mm bleed and click new document

6) Bring image to new canvas

7) Press M to tidy the rectangle tools to edit rectangle edge

8) Add a shape and fill up with colour

9) Design the shape according to your creativity

10) Add font and adjust the angle according to you

11) Lastly, click save


So, this is the simple video step how to use illustrator :


How to create poster using photoshop

How to create poster using photoshop


Hai,assalamualaikum.Hari ni saya nak share software yang paling selalu digunakan oleh semua orang untuk menghasilkan satu poster atau banner.

Nama software ini ialah photoshop.Photoshop ini boleh digunakan di telefon bimbit dan di pc. Tetapi sekarang saya akan tunjukkan photoshop yang digunakan di pc.

Langkah-langkah : 

  1. Pergi dekat FILE kemudian tekan NEW  ( pilih saiz yang diingini)
  2. Seterusnya, akan keluar latar belakang yang kita pilih .
  3. Perbaiki latar belakang tersebut menjadi blur kemudian pilih warna warna yang diingini.
  4. Masukkan gambar yang korang nak (pastikan gambar yang dipilih diedit terlebih dahulu)
  5. Masukkan fonts  (pilih tempat yang nak letak )
  6. Lepas dah siap boleh terus save.
Ini sahaja simple tutorial untuk membuat poster. Lihat video dibawah untuk lebih faham .


how to use canva

HOW TO USE CANVA


STEP:

  1. First , you must sign in with your email.
  2. Second, you must choose what types that you want to edit such as poster,banner etc
  3. I would like to show how to make simple poster with canva and choose one picture for a background.
  4. Then, adjust your effect like brightness,contrast and saturation for enhance more detail.
  5. Put a text its up to you.
  6. Final step is save and share to all social that you have like Facebook, Instagram and Twitter.


Thursday, August 1, 2019

Simple tutorial

  1.   MEMBUAT BUTTON FOLLOW DI PAGE


1. sign in bloggers > tekan layout > add a gadget > tekan followers 


FFunction button followers ini adalah untuk memudahkan orang yang berminat dengan blog kita untuk mengikuti perkembangan blog kita lepas ini.


2.CARA MELETAKKAN JAM DI PAGE

1.Google > https://www.clocklink.com/ > pilih theme jam > pergi ke blog > add a gadget > tekan HTML/Java Script > masukkan copy link di clocklink > save 


HTML/JavaScriptHTML/JavaScriptAdd
Add third-party functional


3.CARA LETAKKAN CHAT BOX DI PAGE BLOG

1.google  > https://www.cbox.ws/ > masukkan email > create Cbox > masukan URL blog  > bukak blogger > pegi ke layout blog > add a gadget > tekan HTML/JavaScript > masukkan link dari cbox tadi 


Add third-party functional

function chat box ini adalah untuk memudahkan lagi owner dan pengunjung blog untuk berbual

5.UCAPAN SELAMAT TINGGAL KEPADA READER BLOG


1. Sign in blogger > Design > Edit HTML


HTML/JavaScriptHTML/JavaScriptAdd
Add third-party functionality or other code to your blog.
By Blogger 

2. Cari code ini, nak mudah tekan Ctrl F, masukkan code dalam kotak find dan enter!</head>
3. Copy code dibawah dan paste selepas/di bawah code yang dicari tadi.
 <script type='text/javascript'>
// goodbye alert
function goodbye(){
alert(&#39; Terima Kasih, sila datang lagi &#39;);
}
parent.window.onunload=goodbye;
</script>
4. Gantikan, Terima Kasih, sila datang lagi dengan ayat sendiri
5. Save. buka blog  dan close.ada tak ucapan itu sebelum close


6.MASUKKAN LAGU KE DALAM BLOQ
1.bukak google bukak laman web 
https://soundcloud.com/

2.search lagu yang nak


3.tekan share > pilih embed  > copy code 


4. bukak blog > add gadget > edit HTML >paste kan code lagu 
HTML/JavaScriptHTML/JavaScriptAdd
Add third-party functionality or other code to your blog.
By Blogger 


bunting ( Tourism Malaysia)

Hello and assalamualaikum everyone , so this is group bunting about Tourism Malaysia. 

bye

Related Posts Plugin for WordPress, Blogger...